
This has been a very busy week. Thanksgiving, Potty Training and I have been working on several pieces for a craft bazaar I am attending this coming Friday.
My Thanksgiving was very nice, my mom and her husband came over and we had a lot of fun. I think I am still in a Turkey coma!!
I want to thank everyone who left me tips on potty training. Jordan has made such great progress since the beginning of the week. Of course there have been accidents, but due to the reward system I have put into place, he is really getting it down. I have a sticker chart and when it is full, I am taking him to Legoland and every time he goes potty the "Potty Fairy" brings him a jelly bean which magically appears on the kitchen table when he is done washing his hands. I also bought him some Trasformer and Spiderman underwear and he does NOT want to pee on them (it is so cute, he has been playing with the underwear and keeping them in a little box with him at all times). We are still working on the poo poo part (that is much harder).
I have been making more ornaments, shadowboxes and door hangers. I also made a really cute magnetic recipe board for Jordan's teacher. About a year ago, I was really tired of looking down on the counter at my recipe cards and how dirty they got when I was preparing meals. So I created this magnetic board and now the cards stay clean and I don't have to strain my neck looking down at them on the counter. I think they are really neat and a great gift idea. In fact, it is going to be very hard to give away the new one I made because I like it so much better than the one I made a year ago for myself. I am going to make a few more for the craft bazaar (I will post them when I make them).
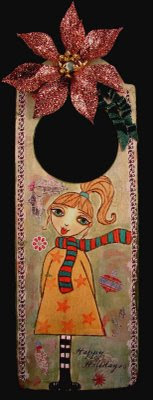
My mom really wanted me to draw a girlie with a pony tail, so here she is. I really like how she turned out.
This is a commissioned ornament for a friend of mine. Her daughter has a little Christmas tree in her room and all of the ornaments are purples and pinks. This was really fun to make.

Here is another Shadowbox (which I am addicted to making by the way!!)

This ornament is called "Warm Wishes" and I used these really cool clear bubbles (I think they are called raindrops) on the piece which I just love...

When I bought this ornament, it was unfinished wood, so I painted it and crackled it to make it look like an old vintage piece.

Here is the front of the magnetic recipe board (I bought a stand for it as well). I also made the glass magnets.

Here is the back of the magnetic board. I made a pocket for the recipe cards to be placed when not in use.

Here is what it would look like when in use.


 Next, wait until the Crackle Medium dries (you can use a heat gun to speed up the process). In this picture you can see the cracks but they really don't stand out very well.


