PHOTOSHOP
Next, open the picture in PS, crop and adjust the colors.
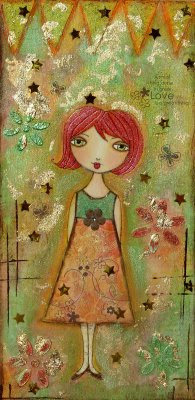 Now she is a little darker and the colors are more vibrant (like the original).
PREPARING THE FILE TO PRINT
Now when you print the picture, you want to create a white background so you can judge what your print will look like on a full sheet of paper (I print mine on 8.5 X 11). You also want to have a little bit of a white border around it so your buyer will have an easier time framing it. In this case, my original is an odd size (9X12) so there will be a lot of white around the edges. (I will go into how to frame an odd size later in the post).
1. Go back to Photoshop and select "File" and then "new"
2. The popup box will allow you to create the size of the white background. Select "Preset Size" and choose 8.5 X 11. Then click "white background" at the bottom of the box.
Now you should have a white background that when printed, will come out to 8.5 X 11.
3. Now select "File" and "Open" to pull up your color adjusted picture. Ok this part I usually have to just play around with. Click on your picture and select the "move" tool on your side toolbar menu. Drag the picture into your white background. This will show you how much you will need to adjust the picture to fit into the 8.5 X 11 page.
4. To adjust the size of the picture (click on the picture) and select "Image" and then "Image Size." This is VERY IMPORTANT!! Make sure the box that says "constraint proportions" IS checked. If it is not, your picture will become blurry when you re size it. Trust me...
Now, you can adjust the size by percent or pixels; I use pixels. So, play with the "width" size and adjust until you get the picture on the white page just how you like it. You will have to keep adjusting and then moving the picture back to the white page and if you don't like it click "edit" and "step backward" to remove it. Each picture is different, so there is no standard pixel to adjust it to. (I really hope this makes sense).
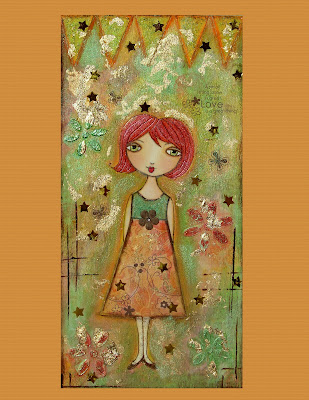
I made the background orange instead of white so you could see how it would print out on the page (yours will be white).
SENDING PICTURE TO BE PRINTED...YAY!!!
I am going to recommend an online company to have your pictures printed because after research, I decided they are the best and easiest way to get your pictures printed. You can go to a local print shop, but most of them do not specialize in art. In most cases each of your pictures will need to be viewed by a professional so any adjustments can be made. I really don't think most print shops do this. They will just mass print your pictures and not stop to look and make sure the colors look good (In my opinion).
So go to http://www.iprintfromhome.com/
You will need to set up an account (it is free) and then you can upload your pictures to them. You can choose what size to print the picture (like I said earlier, I use 8.5 X 11, but they have many sizes to choose from. You just have to make sure you adjust your white page in photoshop accordingly). They will take the time to make sure the colors in your prints come out right. We are doing most of the work in photoshop ourselves, but every printing machine is different and they will make sure the color quality is good.
The really cool thing is, I got my order in 2 days!!! You will probably pay a little more here than a local print shop, but I feel it is worth it. The last thing you want is to send poor quality out to a customer.
**Good luck everyone...I really hope this was helpful. I tried to do screenshots of each step, but couldn't figure out how to do it from my laptop (sorry). If you have any questions, please feel free to e-mail me and I will try and help the best I can.
FRAMING AN ODD SIZED PRINT