Pages

Sunday, November 30, 2008

Busy Busy!!!


This has been a very busy week. Thanksgiving, Potty Training and I have been working on several pieces for a craft bazaar I am attending this coming Friday.

My Thanksgiving was very nice, my mom and her husband came over and we had a lot of fun. I think I am still in a Turkey coma!!

I want to thank everyone who left me tips on potty training. Jordan has made such great progress since the beginning of the week. Of course there have been accidents, but due to the reward system I have put into place, he is really getting it down. I have a sticker chart and when it is full, I am taking him to Legoland and every time he goes potty the "Potty Fairy" brings him a jelly bean which magically appears on the kitchen table when he is done washing his hands. I also bought him some Trasformer and Spiderman underwear and he does NOT want to pee on them (it is so cute, he has been playing with the underwear and keeping them in a little box with him at all times). We are still working on the poo poo part (that is much harder).

I have been making more ornaments, shadowboxes and door hangers. I also made a really cute magnetic recipe board for Jordan's teacher. About a year ago, I was really tired of looking down on the counter at my recipe cards and how dirty they got when I was preparing meals. So I created this magnetic board and now the cards stay clean and I don't have to strain my neck looking down at them on the counter. I think they are really neat and a great gift idea. In fact, it is going to be very hard to give away the new one I made because I like it so much better than the one I made a year ago for myself. I am going to make a few more for the craft bazaar (I will post them when I make them).

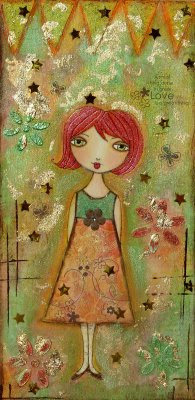
My mom really wanted me to draw a girlie with a pony tail, so here she is. I really like how she turned out.


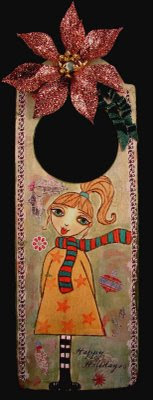
This is a commissioned ornament for a friend of mine. Her daughter has a little Christmas tree in her room and all of the ornaments are purples and pinks. This was really fun to make.

Here is another Shadowbox (which I am addicted to making by the way!!)

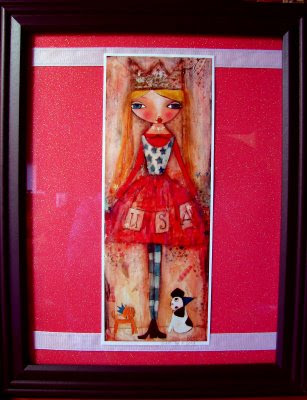
This ornament is called "Warm Wishes" and I used these really cool clear bubbles (I think they are called raindrops) on the piece which I just love...

When I bought this ornament, it was unfinished wood, so I painted it and crackled it to make it look like an old vintage piece.

Here is the front of the magnetic recipe board (I bought a stand for it as well). I also made the glass magnets.

Here is the back of the magnetic board. I made a pocket for the recipe cards to be placed when not in use.

Here is what it would look like when in use.

Monday, November 24, 2008

I am taking a potty break!!


Potty training that is... I'm going to be a little absent this week. Since we are on Thanksgiving break this week (no pre-school), I have decided to get this kid potty trained. Enough is enough already!!! He turned 3 on Oct. 2nd and boy is he a stubborn one (just like his dad...LOL!). I have tried several times and many potty charts and incentives, even the Potty Fairy...(don't ask) and nothing has worked. Well I am staying home and not going to see the light of day this week until my little boy is peeing and pooing in the potty!!!! Wish me luck...boys are tough!! Feel free to leave comments with potty tips that have worked for you (I could use all the help I can get).

On an art note, I am working on more ornaments, shadow boxes, door hangers and other Christmas goodies for a craft bazaar on Dec. 5th that I will be attending. I will post pictures soon...

I also have a few more tutorials in mind, so stay tuned.

Tuesday, November 18, 2008

Shadow Box "Christmas Morning"


Here is what I have been working on the past few days. I am adding it to my shop tonight.

Saturday, November 15, 2008

Paper Doll


The theme this month for a new challenge blog called "Colors Within my Soul" is paper dolls. It just so happens that I made one for a swap. It was so much fun to make and I will definately be making more.


Thursday, November 13, 2008

Blog Award...Woo Hoo!


The very talented Bee from Witchetty has been kind enough to give me a very cute Blog award. Go check out Bee's blog, her work is so fabulous!!!


But of course when you receive a blog award, there are rules...


1. Put the logo on your blog

2. Add a link to the person who awarded you

3. Nominate 10 other blogs for this award

4. Add links to those blogs

5. Leave a message for your nominees on their blogs

6. Give a reason why you consider their blogs cool


Wow, 10 other blogs is a lot...but it won't be hard for me; there are so many blogs I subscribe to it's crazy...


1. Nancye's art and beautiful junk- An amazing artist; I always look forward to seeing her work.

2. Nolly Posh- A beautiful person! Her strength and outlook on life just shines through her blog.

3. Scrappy Jessi- Tons of blog candy and she is having a great give-away right now.

4. Michelle My Belle- I just discovered this lovely chickie's work...AMAZING!!!

5. Just in time designs- Another amazing artist. I just love her girlies!!!

6. Hands & Heart- Monica is one of my all time favorites; her artwork is very special (as is she).

7. Goody-Goody- Great Fabric Art and tutorials.

8. Blue Eyed Girl- She works with all different mediums & makes the cutest wooden ATC's.

9. Distracted by Design- I love watching her style evolve...she is true talent!

10. Michelle Brown- A wonderful watercolorist; she is starting to offer classes online as well.


Whew! That took awhile...there are so many wonderful blogs out there...

Monday, November 10, 2008

One Step Crackle Tutorial!

I had a great response with the last tutorial I posted so I thought I would make it a regular thing. This tutorial is about the crackle method I use on some of my pieces. Most crackle mediums are a two step process, but this medium is only one, which makes life much easier.


This is a very easy process, so I hope you will try it out.

Items needed:

Painted Piece (on any substrait)
Dark Brown Stain or Acrylic paint
Damp paper towel
Dark brown or black oil pastel (optional)


Take a generous amount of the crackle and a soft paint brush and brush onto your painting (I even put it over my girlie's face, but you don't have to if you don't want). Remember, don't be stingy with the crackle, put a thick even amount on there...

Next, wait until the Crackle Medium dries (you can use a heat gun to speed up the process). In this picture you can see the cracks but they really don't stand out very well.


Next take about a teaspoon of your dark brown stain or acrylic paint (your choice) and squeeze it onto your pallet. If you are using acrylic paint, mix a little bit of water in the paint to thin it out. I usually take a spray bottle and squeeze it one time and then mix it with my paint brush.


Brush on the paint on in sections and then wipe off with a damp paper towel. Do this until you have stained the whole painting.


Now your cracks are showing...YAY!!


Now because I used dark colors on this piece, the cracks are more subtle, below is another piece I did with lighter colors and the cracks are more prominent.


The last thing I like to do is frame the edges with a dark oil pastel. In this case I used black (again, because the colors I used were so dark. I would normally use dark brown if the background colors are lighter). You color the edges with the oil pastel and then take your finger and blend.


Here is my finished piece after I added some embellishments. I think it looks very Victorian and old. "Christmas Angel" is now in my shop.


You can also see this piece on the Embrace the Face challenge blog. This months theme is Lace.


Saturday, November 8, 2008

Christmas Door Hanger!


Here is a new Christmas piece I just completed. It is painted on a wooden door hanger. I woodburned the girlie and used lots of demension on the piece. I just added her to my shop!! Also, stay tuned for another tutorial. The next one will be on using crackle...

Wednesday, November 5, 2008

Making Prints (Tutorial)

I have been getting a lot of questions about how to make prints of artwork that I thought I would post a tutorial.

First let me say that I am NOT an expert by any means, but I have been doing a lot of research on how to do this...

TAKING A QUALITY PHOTO

The best way to take a quality photo is by using natural light. I take my artwork outside (since I live in San Diego, it is pretty much sunny all of the time so that helps). Or sometimes I will take the picture by a sunny window. Just make sure there are no shadows. If it is rainy or cloudy, then a light tent is ideal. If you do a search on the net under "light tent" you will find information on how to purchase one or how to make an inexpensive one yourself.


The photo looks good, but is a little light and the colors aren't as vibrant as the original...

PHOTOSHOP

Next, open the picture in PS, crop and adjust the colors.

After you crop the picture, go into "image" at the top of the screen and then "adjustments." In the adjustments drop down box there are three places I go to adjust the colors. First I adjust the colors in "Color Balance" Just make sure you adjust ALL tones (shadow, midtone and highlight). Then I go into the "Brightness/Contrast" and adjust that to my liking. Last, I go into "Hue/Saturation" and adjust that. By playing with these 3 adjustments, you should be able to get the colors as close to the original as possible.

Now click "save as" and save the file as a JPEG to your pictures folder (or whatever folder you choose). Now she is a little darker and the colors are more vibrant (like the original).
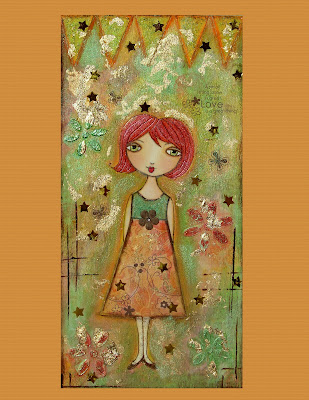


PREPARING THE FILE TO PRINT

Now when you print the picture, you want to create a white background so you can judge what your print will look like on a full sheet of paper (I print mine on 8.5 X 11). You also want to have a little bit of a white border around it so your buyer will have an easier time framing it. In this case, my original is an odd size (9X12) so there will be a lot of white around the edges. (I will go into how to frame an odd size later in the post).

1. Go back to Photoshop and select "File" and then "new"

2. The popup box will allow you to create the size of the white background. Select "Preset Size" and choose 8.5 X 11. Then click "white background" at the bottom of the box.

Now you should have a white background that when printed, will come out to 8.5 X 11.

3. Now select "File" and "Open" to pull up your color adjusted picture. Ok this part I usually have to just play around with. Click on your picture and select the "move" tool on your side toolbar menu. Drag the picture into your white background. This will show you how much you will need to adjust the picture to fit into the 8.5 X 11 page.

4. To adjust the size of the picture (click on the picture) and select "Image" and then "Image Size." This is VERY IMPORTANT!! Make sure the box that says "constraint proportions" IS checked. If it is not, your picture will become blurry when you re size it. Trust me...

Now, you can adjust the size by percent or pixels; I use pixels. So, play with the "width" size and adjust until you get the picture on the white page just how you like it. You will have to keep adjusting and then moving the picture back to the white page and if you don't like it click "edit" and "step backward" to remove it. Each picture is different, so there is no standard pixel to adjust it to. (I really hope this makes sense).


I made the background orange instead of white so you could see how it would print out on the page (yours will be white).


SENDING PICTURE TO BE PRINTED...YAY!!!

I am going to recommend an online company to have your pictures printed because after research, I decided they are the best and easiest way to get your pictures printed. You can go to a local print shop, but most of them do not specialize in art. In most cases each of your pictures will need to be viewed by a professional so any adjustments can be made. I really don't think most print shops do this. They will just mass print your pictures and not stop to look and make sure the colors look good (In my opinion).

So go to http://www.iprintfromhome.com/

You will need to set up an account (it is free) and then you can upload your pictures to them. You can choose what size to print the picture (like I said earlier, I use 8.5 X 11, but they have many sizes to choose from. You just have to make sure you adjust your white page in photoshop accordingly). They will take the time to make sure the colors in your prints come out right. We are doing most of the work in photoshop ourselves, but every printing machine is different and they will make sure the color quality is good.

The really cool thing is, I got my order in 2 days!!! You will probably pay a little more here than a local print shop, but I feel it is worth it. The last thing you want is to send poor quality out to a customer.

**Good luck everyone...I really hope this was helpful. I tried to do screenshots of each step, but couldn't figure out how to do it from my laptop (sorry). If you have any questions, please feel free to e-mail me and I will try and help the best I can.


FRAMING AN ODD SIZED PRINT

Here is a print that I bought awhile ago from Suzi Blu. When I got the print, I was so excited! But then I thought to myself "How the heck am I going to frame this odd size?" Well being the creative spirit I am, I whipped out some scrapbook paper and ribbon. Here is what I came up with.


The frame is 8X10 and the paper was 12X12, so again, I had to get creative. I actually cut down the paper and then glued it onto the heavy cardboard that comes with the frame. My next problem was that I had two lines from where I cut the paper. One on top and one on the bottom. So to fix THAT problem, I took some white ribbon and taped that across the top and bottom. I cut off most of the white border around the print, but I like how the white framed the picture plus she signed the bottom and I didn't want to cut that off. Voila!!! Weird print size....FRAMED!

You could also get one of those floating frames, but I have never tried one of those...


Monday, November 3, 2008

PRINTS ARE FINALLY IN MY SHOP!!!!


I just added some prints to my shop!!! I have been wanting to do this for awhile and finally after much research and work in photoshop...I did it! I hope you come and check them out.